
Welcome to Kamranicus [YAPS]
YAPS (Yet Another Personal Site)
My other site Intrepid Studios will be undergoing some major changes soon, due to my dad taking most of the reigns. It will shift from being mostly my pet project site to an actual commercial site. I won't be doing much directly with it anymore and I needed a new home for all my stuff.
Thus, I welcome you to Kamranicus! I decided to create my own personal site and learn some new technology in the process. I knew a thing or two about MVC but I had yet to sit down and learn it first-hand. It was great timing because at work I am coming onto some existing ASP.NET MVC applications.
Overview
One thing you hopefully won't notice is that I don't bother to support any browser less than the latest modern versions (IE9, FF4, Chrome, etc). This is on purpose, mainly to decrease maintenance and development time, but also because I've always wanted to say 'eff you to all those nasty old browsers (I am including IE8 and below in this category).
Homepage
The homepage is all JSON-based, except the blog overview. The "feeds" use my .JSON library and the code consists of about one line per feed I need:
dynamic[] repositories = JsonService.GetFrom("http://github.com/api/v2/json/repos/show/kamranayub").repositories;
dynamic[] forSale = JsonService.GetFrom("http://marketplace.envato.com/api/v2/new-files-from-user:kayub,codecanyon.json").newfilesfromuser;
dynamic[] tweets = JsonService.GetFrom("http://api.twitter.com/1/statuses/user_timeline.json?screen_name=kamranayub");
dynamic soAnswers = JsonService.GetFrom("http://api.stackoverflow.com/1.1/users/109458/answers?pagesize=6&sort=creation");
The blog is custom-made and bare-bones. You ask, "But why not use a proven full-fledged blog framework?" I wanted the first-class integration, I wanted some custom stuff, and because I just needed a good excuse to learn Razor and MVC 3 properly. This was a great exercise and I hope to share it with you soon.
MVC 3 Razor Blog Features
Admin Panel Free
I didn't want to build a separate admin panel for my blog. I built it so that I can manage it using a pretty reasonable workflow. When a post is displayed, I see this above it:

I can delete it on the spot or edit it inline via AJAX. Over a comment, you and I can see this:

For now I am not putting a time limit for editing or deleting comments... it is also tied to the same OpenID account you posted the comment as, so if you login with a different one, you won't be the owner. I should mention, the way it is coded, I cannot delete or edit your comments. If spam becomes an issue (which I will guess it will) then I'll have to at least be able to mark comments as spam.
REST-based Design
I made the routes designed as a poor man's REST implementation. So lots of things support AJAX through the same URLs as browsing without JS.
This allows me to do fun inline-editing of my posts and allows you to inline edit your comments.
It also allows me to not duplicate any templates as I can just pass the same exact partially-rendered views to jQuery as I do normally without JS.
OpenID Support
Since I didn't want to create my own membership system, I just use some very basic OpenID using DotNetOpenAuth.
I don't store anything except your claim ID, nickname (if given), and email (if given).
Gravatars
I don't know why but this was important to me. It's so easy to implement but it just looks awesome.
Kamdown
Windows Live Writer is great, but I really love Markdown. This was one big reason I didn't want a huge blog library, I needed this. I didn't bother with any Metaweblog API hooks because I liked the web-based approach to updating my blog and the simplicity of Markdown.
I use a slightly enhanced version of Markdown (called Kamdown, har har) for my posts and your comments. For my posts, I implemented the SUPA Java applet to add copy/paste support for images:
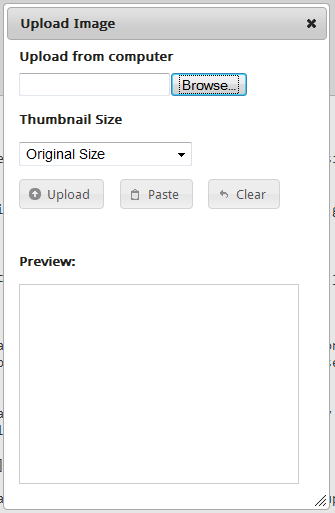
It just adds the image data to the DB and outputs a URL: 
This works both from clicking a button to open the dialog and also by just hitting Ctrl-V in the textbox.
I also was inspired by GitHub's great interface for Markdown-enabled fields, letting you hotswap between plain text or previewed HTML. I love it!

I am using the SyntaxHighlighter JS plugin to do syntax highlighting. I initially tried IronPython with Pygments, but there were some memory issues and I decided not to use it as it wasn't stable. A shame since that is the library GitHub uses and it's very nice. I may go back and try to figure out what the problem was.
You use it the same way you use code blocks in GitHub wikis, triple-ticks (`).
SubSonic + Ninject
I really liked SubSonic's SimpleRepository so I used it. I didn't bother with much layering and focused more on getting things done so most of my data access code is 1-2 lines wherever I need it.
I use Ninject as my DI framework because it's simple and straight to the point.
AppHarbor Deployment
I am using the free AppHarbor instance to host and deploy the site (using a separate back-end I get for free).
It's a really neat service but it still needs some minor adjustments, such as more separation between environments (for testing). I may talk about this later. That said, it does its job well and the free instance seems to be fast enough for my needs. I do have Arvixe to fall back on, but their control panel and setup was being too ornery for me.
So where's the code?
I hope to release my code soon, as soon as I clean it up and make it somewhat presentable. I figure it'd be nice to let other people build their own custom blogs from a small codebase like I did. It's separated into its own Area, so the code is separate from the core site. The great thing is you get all the integration MVC provides and it's as customizable as you need it to be.